Flat roof leaking? Call (253) 345-4607 for same-day assessment — we work on TPO, EPDM, and modified bitumen roofs across King, Pierce & Snohomish Counties. Emergency response available.
Flat roofs and low-slope roofs are everywhere in Seattle — on mid-century commercial buildings in SODO and Capitol Hill, on garage and addition roofs behind craftsman homes in Ballard, on multi-family housing from Columbia City to Northgate, on the industrial buildings that still define much of the city's working waterfront. They perform exceptionally well under the right conditions. They fail fast when a drain clogs at the wrong time, a seam separates after years of thermal cycling, or an aging membrane finally reaches the end of its adhesion life.
The challenge with flat roof repair isn't the repair itself — it's the diagnosis. On a 2:12 slope or flatter, water doesn't behave the way it does on a pitched roof. It doesn't run off. It dwells on the surface, migrates horizontally under the membrane through saturated insulation, and can travel 15–20 feet from the actual failure point before appearing as a ceiling stain inside the building below. Repair the ceiling stain location and you've addressed the symptom. Find the actual membrane failure and you've solved the problem.
This guide covers how each major flat roofing system is constructed and how it fails in Seattle's climate, the right diagnostic process before any repair investment, what repairs look like in practice, how to evaluate repair vs. replacement, and what flat roof work costs in King and Pierce Counties in 2026. If you're managing a commercial building or a residential property with a flat roof section, this is the complete picture.
The Three Major Flat Roof Systems Used in Seattle
Before repair can be discussed intelligently, the system matters. Each of the three dominant flat roof membranes in the Pacific Northwest fails differently, is repaired differently, and has a different expected lifespan.
TPO (Thermoplastic Polyolefin): Seattle's Dominant Commercial Membrane
TPO has become the standard commercial and residential flat roofing membrane in the Pacific Northwest over the last two decades. Walk any commercial roof in Seattle today and you're more likely than not standing on a white TPO membrane. The reasons are straightforward: when correctly installed, heat-welded TPO seams are stronger than the membrane itself, the white reflective surface handles Seattle's limited but intense summer UV better than black membranes, and the material is resistant to the algae and biological growth that Seattle's moisture promotes.
How TPO is constructed: A TPO system consists of a membrane layer (typically 45, 60, or 80 mil thickness — heavier membranes in commercial applications), installed over polyisocyanurate (polyiso) insulation and a cover board. The membrane can be mechanically fastened, fully adhered, or ballasted. Seams between sheets — which occur at every 8-10 foot interval across the field — are heat-welded with a hot-air gun to create a continuous, watertight bond.
Common TPO failure modes in Seattle's climate:
- Seam separation and delamination: The #1 cause of TPO failure. In systems over 12–15 years old, the membrane oxidizes and becomes more rigid, making existing seams more prone to cracking under thermal movement. Seams that were underheated during original installation — a common installation defect that shows up years later — are the most vulnerable.
- Penetration flashing delamination: Every pipe, HVAC curb, skylight, and rooftop exhaust penetrating a flat roof requires flashing that's bonded to both the penetration and the field membrane. These transitions experience the highest stress concentration on the roof and are disproportionately represented in leak calls.
- Drain failure and ponding: Seattle's combination of abundant tree cover (big-leaf maple, western red cedar, Douglas fir) and 38+ inches of annual rainfall creates persistent drain clogging. ASTM D751 test standards for TPO membranes note that ponding water at just 1 inch depth exerts approximately 5.2 lbs/sq ft of sustained pressure on the membrane — significant stress on older seams.
- Foot traffic punctures: Every HVAC service call, satellite dish adjustment, or rooftop solar installation represents foot traffic risk on TPO membrane. Without proper walk pads, a boot heel can puncture 45-mil TPO membrane.
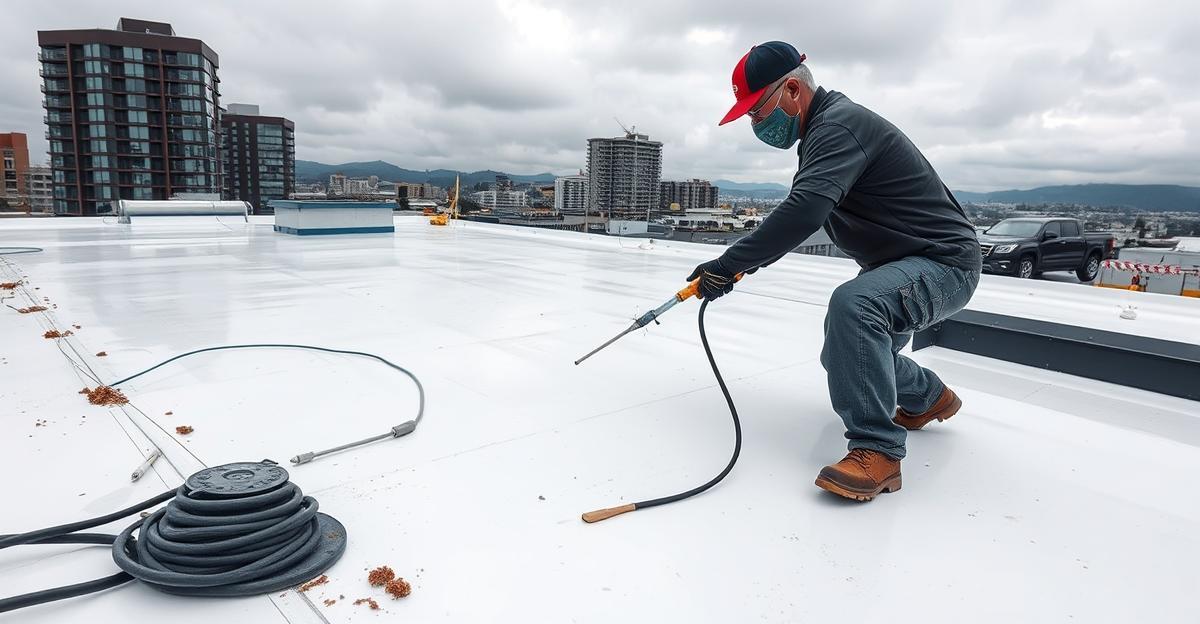
TPO repair approach: Failed seams are re-welded with a hot-air gun and covered with a heat-welded cover strip (reinforced seam tape) for redundancy. Punctures and tears receive heat-welded TPO patches. Penetration flashings are stripped, re-detailed with new flashing tape, and re-adhered or mechanically fastened. For comprehensive TPO information and certification standards, see our dedicated TPO roofing Seattle guide.
EPDM (Ethylene Propylene Diene Monomer): The Proven Pacific Northwest Standard
EPDM — the black rubber membrane — was the dominant flat roofing material in the Pacific Northwest before TPO emerged in the 2000s, and it retains a strong presence on residential low-slope applications, walkways, and in cases where specifiers prefer a material with a multi-decade track record. The EPDM Roofing Association notes that properly installed EPDM systems regularly achieve 25–30 year service lives in wet climates — a performance record earned significantly in the Pacific Northwest.
How EPDM is constructed: EPDM comes in large sheet widths (up to 50 feet wide), reducing the number of field seams compared to earlier narrow-roll products. It can be fully adhered, ballasted with river rock, or mechanically fastened. Unlike TPO, EPDM seams are bonded with adhesive (lap adhesive at factory-produced seams, contact cement for field splices) rather than heat-welded — which makes EPDM highly repairable without specialized equipment.
Common EPDM failure modes in Seattle's climate:
- Adhesive seam failure: EPDM seams rely on lap adhesives that degrade over decades of thermal cycling. Seam failure appears as lifting at the lap edge and is detectable by probing with a putty knife — sound seams resist; failing seams pop open. A 2022 technical bulletin from the National Roofing Contractors Association (NRCA) identified adhesive seam failure as the primary cause of EPDM leaks in systems over 15 years old.
- Membrane shrinkage: EPDM membranes experience a documented long-term shrinkage of 1–3% over their lifespan. On a large commercial roof, that can translate into 6–12 inches of inward pull at parapet walls — tearing membrane from counter-flashings and creating gaps at termination bars. Shrinkage-related failures are common on Seattle EPDM systems installed in the 1990s and 2000s.
- Termination bar failure: Where EPDM terminates at walls and curbs, it's fastened with metal termination bars and sealed with lap sealant. UV degradation and thermal movement eventually crack the sealant, creating water pathways. These can be inspected visually.
- Punctures from debris and foot traffic: EPDM is more susceptible to puncture than TPO on a per-mil basis, though it's also more forgiving to repair.
EPDM repair approach: Failed seams are cleaned with EPDM cleaner and primer, re-bonded with fresh lap adhesive, and reinforced with seam tape. Punctures and tears receive EPDM patch material applied with contact cement. Shrinkage-related failures at parapet walls require relief cuts, re-bonding, and installation of new counter-flashing. Termination bar sealant failures receive new lap sealant after preparation.
Modified Bitumen (Torch-Down): Still Viable on Residential and Transition Roofs
Modified bitumen — called "torch-down" in the Pacific Northwest — is an asphalt-based membrane reinforced with polyester or fiberglass mat and polymer-modified for flexibility. It's installed in two-layer systems (base sheet + granulated cap sheet) and has a granulated surface similar to asphalt shingles. It remains the standard on garage flat roofs, low-slope sections behind gable ends, and on older commercial buildings throughout Seattle.
How modified bitumen is constructed: The APP (atactic polypropylene) and SBS (styrene-butadiene-styrene) modified bitumen systems in Seattle are typically torch-applied: a propane torch heats the back of the membrane until it becomes tacky, and the membrane is rolled into place. SBS membranes can also be cold-adhered or self-adhered. The granulated cap sheet provides UV protection and physical durability.
Common torch-down failure modes in Seattle:
- Blister formation: The most visually distinctive torch-down failure. Blisters form when moisture is trapped beneath the membrane during installation or when ground moisture vapor wicks up through inadequate vapor barriers. Seattle's spring installations on roofs above warm-side insulation are particularly vulnerable. Blisters that remain small are often stable; large blisters (over 6 inches) are usually actively deteriorating.
- Seam delamination: Poorly torched seams (insufficiently heated during installation) separate over time, especially in SBS systems in the wet-season temperature cycling. APP systems are less flexible than SBS at Seattle's winter temperatures.
- Surface cracking and granule loss: Cap sheet surfaces develop oxidation cracks after 12–15 years. Granule loss on torch-down membranes follows the same pattern as on asphalt shingles — bare patches are significantly more UV-vulnerable than granule-coated areas.
- Drain collar failures: Where bitumen meets the metal drain collar, the sealant bond fails over time, creating a water pathway around the drain structure. Drain collar failures are often the last repair attempted because they're often overlooked until the drain area is saturated.
Torch-down repair approach: Small blisters are sliced, dried, and re-adhered with cold adhesive or new torch-applied bitumen. Failed seams are cleaned and re-torched or cold-adhered with matching modified bitumen strip. The National Roofing Contractors Association notes that torch-applied systems require licensed applicators due to fire risk; always verify licenses before any torch work.
Diagnosing a Flat Roof Leak in Seattle: The Right Process
The single most expensive mistake in flat roof repair is skipping proper diagnosis. In Seattle, where flat roofs operate under near-continuous moisture conditions for 8+ months of the year, water entering through a membrane failure doesn't stay where it entered. It spreads.
Why the Ceiling Stain Location Misleads You
Water enters a flat roof assembly through a membrane failure, travels horizontally through wet insulation (polyisocyanurate, expanded polystyrene, or mineral wool depending on the system), and eventually finds a path through the roof deck to the ceiling below. In typical Seattle commercial flat roof scenarios with 4-inch polyiso insulation, water can travel 15–25 feet laterally from the entry point before dripping. Patch above the ceiling stain and you've done nothing useful.
This is not a theoretical problem. In our experience repairing flat roofs in the Seattle area, roughly half of initial repair attempts by property managers or contractors who didn't run proper diagnostics fail — because they repaired the symptom location, not the source.
Diagnostic Tools: What Each One Tells You
Visual inspection is the starting point: identify open seams, visible punctures, debris-clogged drains, blistering, and obvious flashing failures. It catches the major problems visible from the surface but misses subsurface moisture.
Moisture meter (non-destructive probe): A technician walks a grid pattern across the roof surface with a calibrated moisture meter, reading moisture content through the membrane and into the insulation layer. This identifies wet zones across the field. Cost: $200–$600 for a full scan depending on roof size. This is the minimum diagnostic investment before committing to any significant flat roof repair.
Thermal imaging (infrared survey): The most accurate method for mapping wet insulation without cutting into the membrane. Wet and dry insulation store and release heat at different rates — a thermal camera captures the differential at dawn (when the roof has cooled overnight, making wet areas visible as warmer zones) or after a rain event. The American Society for Testing and Materials (ASTM) publishes Standard C1153 specifically for infrared thermography of roof systems — the technical basis for every professional roof thermal survey.
Nuclear moisture gauge (for large commercial roofs only): A quantitative measurement tool that reads moisture percentage through the full roof assembly. Used primarily in pre-replacement decisions on roofs over 10,000 sq ft where the wet area percentage determines whether repair or replacement is more cost-effective.
Core cuts: Where moisture meter data shows unclear boundaries, a 3-inch core cut through the membrane and insulation provides a direct visual — and a sample for laboratory moisture percentage testing. Core cuts are typically used at the boundary zones identified by moisture meter scanning.
The right sequence: visual inspection first, moisture meter to map wet zones, thermal imaging to confirm boundaries and find additional moisture not detectable by probe. Core cuts only where needed to clarify ambiguous zones.
Flat Roof Repair vs. Replacement: The Seattle Decision Framework
The repair-vs.-replacement decision on a flat roof comes down to one thing: how much of the membrane and insulation assembly is still sound. If the problem is localized, repair is almost always the right economic choice. If the problem is widespread, replacement delivers better long-term value — because wet insulation that isn't replaced continues deteriorating the membrane from below regardless of surface repair quality.
| Factor | Favors Repair | Favors Replacement |
|---|
| System age | Under 15 years | Over 20 years |
| Number of leak locations | 1–2 isolated areas | 3+ or diffuse across field |
| Wet insulation coverage | Under 20% of roof area | Over 30% of roof area |
| Membrane condition | Primarily bonded, isolated failure zones | Widespread delamination or blistering |
| Prior repairs | None or one previous repair | Multiple repairs in short timeframe |
| Drain performance | Functional, adequate for roof area | Undersized, chronic ponding |
| Insulation condition | Dry, R-value intact | Saturated, compressed (R-value lost) |
The wet insulation tipping point: When wet insulation exceeds 25–30% of the roof area, the calculation shifts to replacement. Wet polyiso loses 30–40% of its R-value when saturated — that's a measurable heating and cooling cost penalty in addition to the ongoing membrane deterioration. Factoring in energy costs, the 10-year total cost of maintaining a significantly wet flat roof typically exceeds replacement cost.
The repair cost percentage rule: In commercial flat roofing, the commonly accepted threshold is that when estimated repair cost exceeds 25% of replacement cost, replacement delivers better long-term economics. At Seattle replacement costs of $8–$22/sq ft, that threshold on a 5,000 sq ft commercial roof ($40,000–$110,000 replacement) falls at $10,000–$27,500 in repair cost.
For more on the broader repair vs. replacement framework, see our roof replacement cost Seattle guide for full cost breakdowns by material and roof size.
What a Professional Flat Roof Repair Looks Like (Step by Step)
Understanding what a legitimate flat roof repair process looks like helps property owners evaluate contractor proposals and avoid paying for work that won't stop the leak.
Step 1: Diagnostic assessment (1–2 hours). The contractor walks the full roof surface with moisture meters, documents all visible failures, photographs seams and penetrations, and marks the wet zone boundaries. This step is non-negotiable — skip it and the scope is guesswork.
Step 2: Drain inspection and clearing. Every drain is inspected for debris, drain cover condition, and drain bowl integrity. Clogged drains are cleared before any repair work begins — diagnosing a membrane failure while the drain is clogged means you might be misidentifying ponding-water stress as seam failure.
Step 3: Repair scope documentation. The contractor documents: which seams need re-welding, which penetrations need reflashing, which field areas need patches, and whether any insulation needs replacement beneath the membrane. This scope should be in writing before work begins.
Step 4: Surface preparation. Repair areas are cleaned, dried if needed (heat guns for moisture evacuation), and prepped per manufacturer specifications. For TPO, clean membrane with isopropyl alcohol. For EPDM, use EPDM cleaner and primer. For torch-down, remove deteriorated surface material. Preparation quality directly determines repair longevity.
Step 5: Repair execution. Seams re-welded (TPO), re-adhered (EPDM), or re-torched (modified bitumen). Penetration flashings stripped, new flashing membrane installed, fastened and sealed. Patch material heat-welded or adhered over field punctures. Drain collars replaced where failed.
Step 6: Quality inspection and documentation. Probe test on all repaired seams (thermal probe or electronic leak detector). Photograph all completed repairs for documentation. Provide written warranty.
Step 7: Follow-up weather test (ideally after the next significant rain event). A quality contractor will follow up to confirm no new interior water infiltration.
Flat Roof Repair Costs in Seattle: 2026 Pricing Guide
Seattle flat roof repair pricing runs 15–25% above national benchmarks, driven by higher labor rates, the specialized equipment required (hot-air welders for TPO are capital investments of $2,000–$4,000), and higher membrane material costs due to petroleum feedstock pricing.
| Repair Type | Typical Seattle Cost (2026) | Notes |
|---|
| TPO seam re-weld with cover strip | $400–$900 | Per seam section (up to 10 linear ft) |
| EPDM seam re-bond + seam tape | $350–$800 | Per seam section |
| Torch-down seam re-torch | $350–$750 | Per seam section |
| Torch-down blister repair | $300–$700 | Per blister zone |
| Penetration flashing (any system) | $450–$1,100 | Per penetration (HVAC curb, pipe, skylight) |
| Drain replacement or re-flashing | $550–$1,400 | Including clamping ring + sealant |
| Membrane patch (under 20 sq ft) | $400–$900 | Matching material, heat-welded or adhered |
| Membrane section (50–200 sq ft) | $2,000–$6,000 | Includes new insulation if saturated |
| Parapet wall cap replacement | $600–$1,800 per linear foot | Metal or TPO cap |
| Coating application (sound membrane only) | $1.50–$3.50/sq ft | Silicone, acrylic, or urethane |
| Moisture probe survey (full roof) | $250–$750 | Required before significant repair investment |
| Thermal imaging survey | $500–$1,500 | For roofs over 3,000 sq ft |
| Emergency tarping (temporary) | $400–$1,200 | Weather-dependent access |
On diagnostic cost: property owners sometimes resist paying for moisture surveys before repair authorizations. This is the most expensive mistake in flat roof management. A $400 moisture survey that reveals 35% wet insulation means you don't spend $8,000 on a repair that fails in two years — you make an informed replacement decision instead.
For emergency leaks that need same-day response, see our emergency roof repair Seattle guide. For a broader overview of all Seattle roof repair types — including shingle repair and underlayment work — see our comprehensive Seattle roof repair guide.
Insurance Coverage for Flat Roof Damage in Seattle
Seattle property insurance policies cover flat roof damage that results from sudden, accidental events — storms, wind, hail, and falling debris. They do not cover damage from deferred maintenance, age-related membrane failure, or chronic ponding water.
When insurance applies:
- A windstorm separates a large section of mechanically-fastened TPO
- A falling tree branch punctures the membrane
- Hail damages the membrane surface or granulated torch-down cap
- A wind event lifts counter-flashing from a parapet wall
When insurance doesn't apply:
- Membrane reaches end of life and begins leaking
- Ponding water from clogged drains accelerates seam failure
- Moss growth damages flashing adhesion
- Original installation defects manifest over time
Documentation matters: If a storm event causes or contributes to flat roof damage, document it immediately with timestamped photos of the damage and the weather event. Get a professional assessment before filing a claim — adjusters assess claims based on the visible condition of the membrane, and a professional inspection report carries more weight than a homeowner's photos.
Washington State insurance law gives property owners the right to choose their own licensed roofing contractor. Your insurer cannot require you to use a specific contractor — only to use a licensed one.
Seattle Permit Requirements for Flat Roof Work
Understanding permit requirements prevents surprises mid-project. Seattle's Department of Construction and Inspections (SDCI) administers roofing permits under the Washington State Building Code.
No permit required:
- Repair of existing membrane (seam repair, penetration reflashing, patch work)
- Drain repair or replacement (same size and location)
- Coating application over existing sound membrane
Permit required:
- Full membrane replacement (re-roofing permit)
- Adding new roof drains or changing drain locations
- New roof penetrations (structural modifications)
- Adding rooftop mechanical equipment
The Seattle SDCI re-roof permit application requires a roofing contractor license number (verify at L&I contractor lookup), project address, and material specifications. Permits for flat roof replacements typically process in 5–15 business days. For more detail on the permit process, see our Seattle roofing permit requirements guide.
A licensed Seattle roofing contractor pulls all required permits as part of the job. If a contractor tells you permits aren't needed for a full replacement, that's a significant red flag — both for the contractor's licensing status and the quality of the work they're likely to perform.
Seattle-Specific Flat Roof Maintenance: Prevention Is Cheaper Than Repair
The most frequent flat roof repair calls in Seattle trace to failures that proper maintenance would have caught — or prevented entirely. A flat roof in the Pacific Northwest requires a specific maintenance approach calibrated to the climate.
The Monthly Priority: Drain Inspection
Seattle's tree canopy generates a continuous supply of debris — Douglas fir needles, big-leaf maple seedpods, western red cedar fronds, and deciduous leaves — that funnels directly into flat roof drains during rainfall. A clogged drain converts a flat roof into a retention pond within hours of a significant rain event.
Ponding water at just 1 inch depth exerts 5.2 lbs/sq ft of sustained pressure on the membrane. At 2 inches, that's 10.4 lbs/sq ft. On older membranes with existing seam stress, sustained ponding accelerates failure measurably. The King County Stormwater Management program specifically recommends monthly drain inspections for commercial flat-roof properties.
Clear drains monthly during fall and winter. Check after every major wind event regardless of season.
Annual Inspection Protocol
A professional flat roof inspection should occur annually — ideally in September before the rainy season begins — covering:
- Full perimeter walk to check termination bars, parapet cap flashings, and counter-flashings
- All penetration flashings probed for adhesion
- Seam spot-checks using probe in high-stress areas (corners, edges, drain surrounds)
- Drain bowl and clamping ring inspection
- Surface condition assessment (blistering, ponding areas, UV degradation)
Annual inspections on roofs under 10,000 sq ft typically cost $350–$700 from a qualified flat roof contractor. The cost is a fraction of the leak response calls it prevents.
Foot Traffic Management
Flat roofs are accessible — which means they get used for purposes the membrane wasn't designed to accommodate. HVAC technicians, internet and satellite installers, solar contractors, and building maintenance staff all walk flat roofs routinely. Install commercial-grade walk pads wherever regular roof access occurs. The Washington State Building Code requires rooftop walkway protection in commercial applications.
Moss and Algae Control
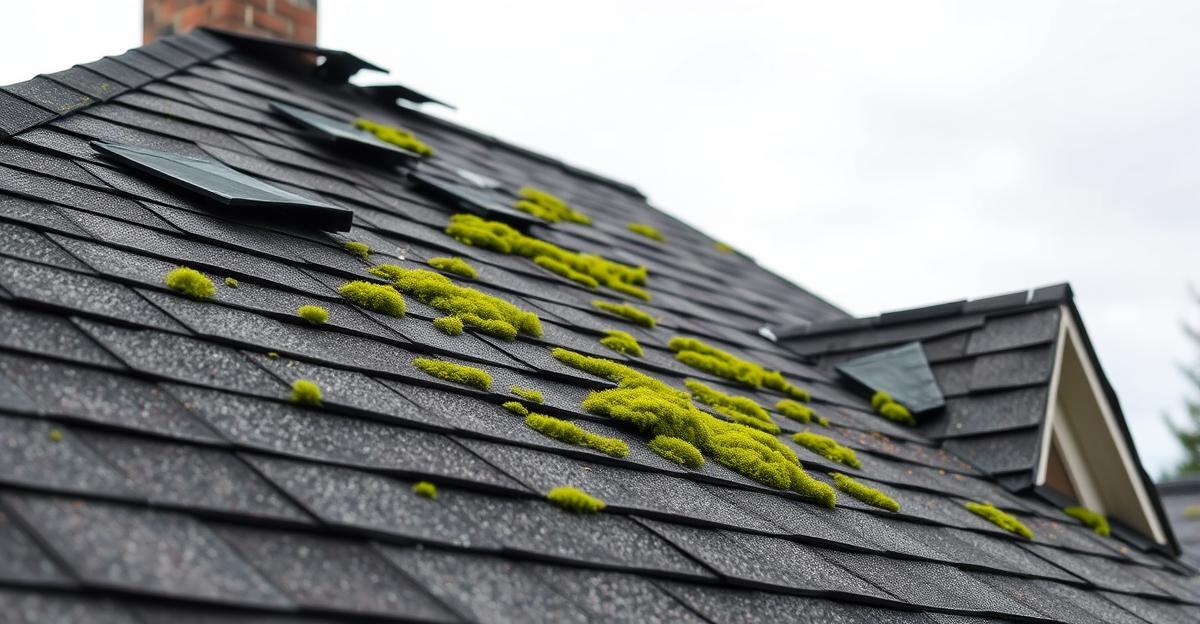
TPO is highly resistant to biological growth due to its formulation and white surface. EPDM and modified bitumen are more susceptible. Biannual application of zinc-sulfate-based moss treatment on vulnerable membrane types prevents the root penetration that degrades surface coatings.
For a comprehensive maintenance schedule applicable to all roofing types, see our how to maintain your roof in Seattle guide.
Flat Roof Replacement: When Repair Stops Making Sense
When moisture survey data shows wet insulation exceeding 30% of roof area, or when a flat roof reaches 20+ years of age with multiple active leaks, the economics of repair vs. replacement shift decisively. Here's what full replacement involves and what it costs in Seattle.
Full TPO replacement (most common in Seattle commercial):
- Tear-off of existing membrane and insulation: $1.50–$3.00/sq ft
- New polyiso insulation (4-inch, R-25): $2.50–$4.00/sq ft
- New TPO membrane (60-mil, mechanically fastened or adhered): $4.00–$8.00/sq ft
- Total installed: $8.00–$15.00/sq ft
- For a 5,000 sq ft commercial roof: $40,000–$75,000
Full EPDM replacement:
- Total installed: $7.00–$13.00/sq ft
Full modified bitumen replacement:
- Total installed: $6.00–$12.00/sq ft
Premium systems (60-mil TPO, adhered, with coverboard):
- Total installed: $15.00–$22.00/sq ft
- Warrants 20–25 year manufacturer warranties from GAF, Firestone, Carlisle, or Johns Manville
For comparison to pitched roofing costs, see our metal roofing Seattle guide, which is an option for some commercial flat-roof applications that allows conversion to a low-slope metal system.
Choosing a Flat Roof Contractor in Seattle: A Property Owner's Checklist
Flat roof repair requires different skills than asphalt shingle roofing, and the Seattle market has both qualified specialists and generalists who will attempt flat roof work without proper equipment or certifications.
Verify system-specific experience and equipment: Ask specifically whether they work with your membrane type (TPO, EPDM, or modified bitumen). Ask what equipment they use — a licensed hot-air welder for TPO seam work costs $2,000–$4,000; contractors without one cannot perform proper TPO repairs and should not be bidding the work. For EPDM, ask about their adhesive and seam tape product lines. For torch-down, verify their torch equipment and licensing.
Require a written scope based on diagnostics: A contractor who provides a repair scope without walking the roof with a moisture meter is guessing at the scope. Any significant flat roof repair investment should be preceded by documented moisture survey data. Insist on this.
Check Washington State licensing and insurance: Verify through the Washington L&I contractor lookup that the contractor holds a current general or specialty roofing license. Flat roof work — particularly torch-applied systems — requires a licensed applicator. Work by unlicensed contractors voids manufacturer warranties on membrane materials.
Ask about manufacturer certification: Firestone, GAF, Carlisle, and Johns Manville all run certified applicator programs. Certified applicators have completed manufacturer training on system installation and repair and can extend manufacturer warranties through certified-repair programs. This is worth asking about.
Request written warranty terms: A quality flat roof repair from a certified contractor should carry a 2–5 year workmanship warranty. Get this in writing.
Ask for references from similar property types: Residential flat roofs and large commercial flat roofs are meaningfully different repair environments. Ask for references from properties similar to yours in size and system type.
FAQs: Flat Roof Repair in Seattle
<FAQSchema />
Get a Same-Day Flat Roof Assessment
If your flat roof is leaking, you're losing time. Water that's already past the membrane is saturating insulation and, in enough cases, damaging interior finishes and structural components below. The repair math gets worse the longer it waits.
The Seattle Roofing Company works on TPO, EPDM, and modified bitumen roofs throughout King, Pierce, and Snohomish Counties. We use Fluke thermal imaging for moisture surveys, carry Firestone and GAF membrane materials, and provide written scopes based on actual diagnostic data before any repair work begins. GAF Certified · IKO ROOFPRO · Directorii Elite.
Call [(253) 345-4607](tel:2533454607) or [request a free flat roof assessment →](/contact). Same-day response available for active leaks.
Reliable. Durable. Built for Northwest Weather.

 Roofing Tips